
When black fly season hits in New Hampshire - I pull out my headgear... quickly.

I don't like to wear hats, especially in the summer - too hot, but I do like to cover my hair - especially when I'm outside and it works it's way out of my ponytail holder and starts flying all around... I hate when gnats and mosquitos and other creatures with too many legs and wings are flying around my hair.
It bothers me.
I will usually be found wearing one of these every day in the warmer months when I'm outdoors, and definitely when we head to the beach (it's a must!) , and so I thought I ought to open the door for you too to be as stylish as me.
Please read this as a joke - I am not laboring under any delusions that these headbands are fashion forward - I just personally like them, and I have never let the questionable glances from others my husband dictate my sense of style (if you want to call it that... I did go through a lengthy period when I thought Dr. Maarten's went with everything, and then there was also a period of time I like to call my "jingly hippie skirt" era...
<sigh>
So without further ado, I open myself up to your ridicule (just don't do it to my face) and offer you a
Summer Headband Tutorial :)

(picture by Johann)
MATERIALS:
2 contrasting fabrics (this headband is reversible) - enough to cut an 18" x 18" triangle from each fabric, + 2 17" x 1" strips
CUT: 18" X 18" triangle from each fabric, and then cut 4" off of the end of each large triangle.
You should have 2: 14" x 14" triangles, and 2: 4" x 26" x 20.5" trapezoids.
Also cut 2 strips: 1" (or 1.5") x 17" long for the ties. (or you can use ribbon if you like)
SEW: Now match up each triangle to it's opposite trapezoid (right sides facing), and sew the trapezoid to the end of each triangle, so that you once again have 2 large triangles.

TRIM: each large triangle so sides are even, and press.


Make your ties by pressing 1/4" toward center on both sides of 1" strips, and then fold in half and press again.
Sew down the length of the tie. (or just use some ribbon)
(sorry - that's not a great photo)
NOW: Place large triangles right sides facing
and here's the important part -

pin your ties with the long side on the inside (or right sides) of the triangles at each corner...

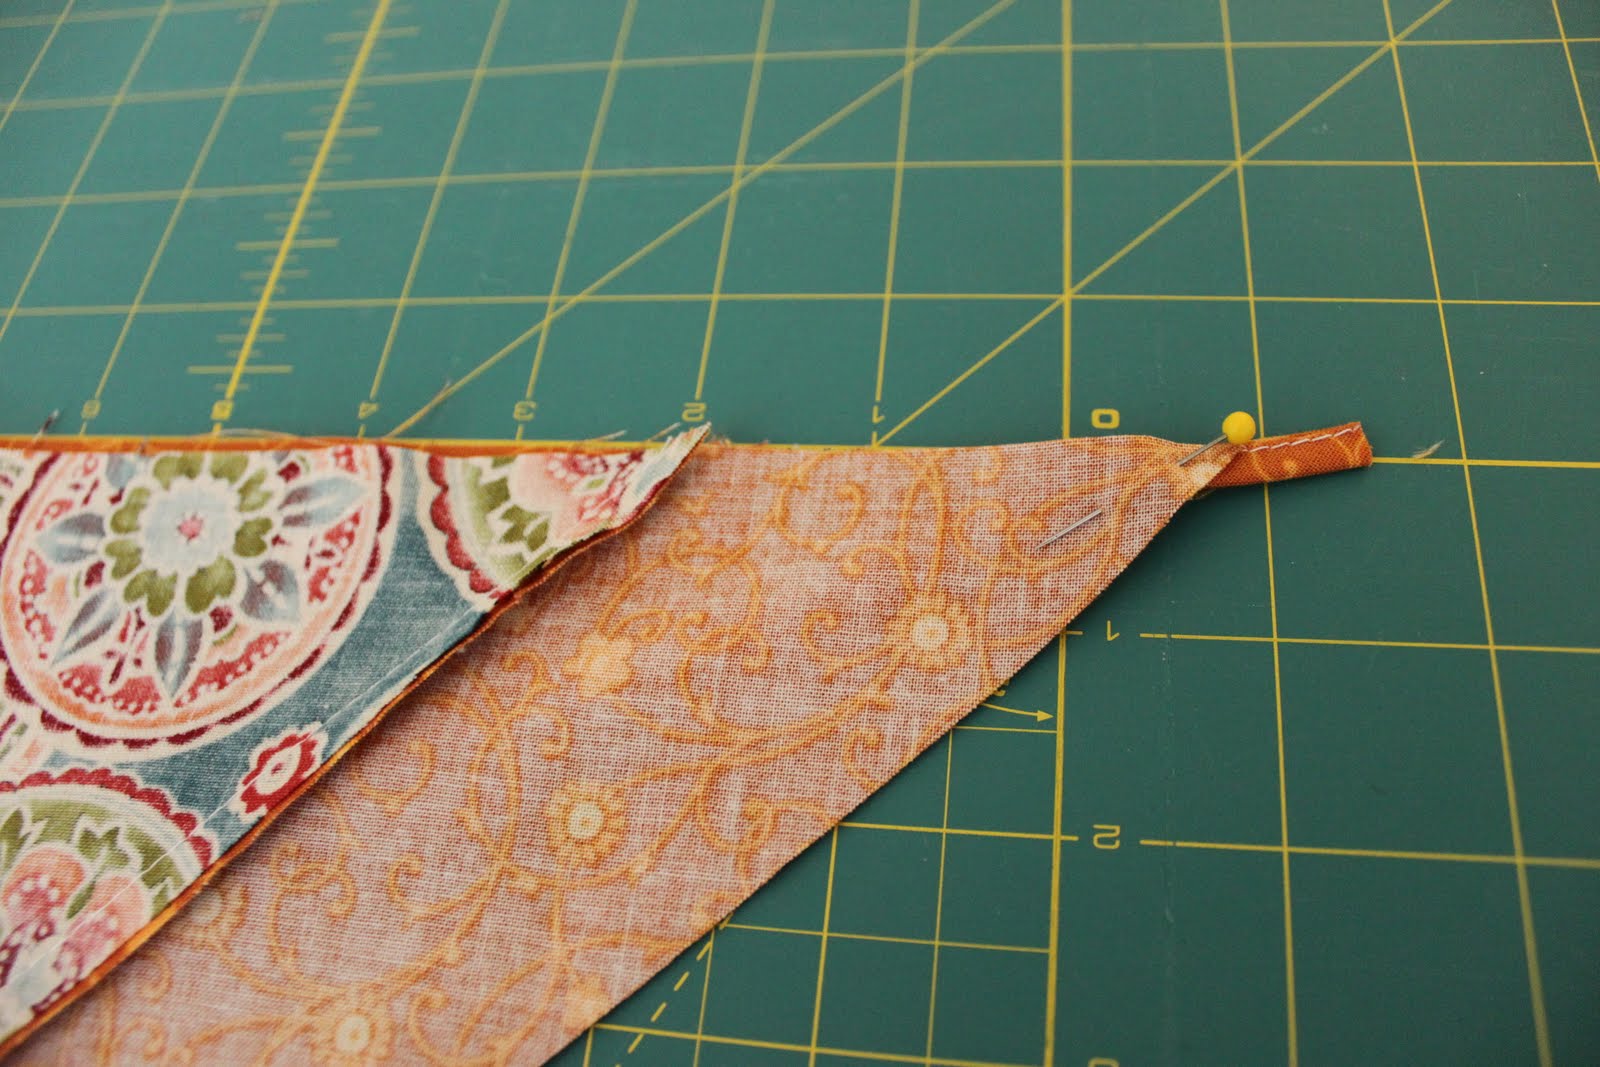
and THEN sew 1/4 seam along the entire triangle, leaving just enough room to turn right side out.
Turn right side out, and press.

Top stitch 3/8" from edge along entire triangle, hand stitch the ends of your ties (if you made them) and you're finished!
Wear with pride and don't let my husband anyone tell you you look foolish,
because you're a head scarf wearing, outdoorsy, flying-bug-repelling rock star kind of gal, and you know it!


ok - that's enough pictures of me for a while...
Great tutorial. I'd love to make one for my oldest daughter. Thanks.
ReplyDelete